Agents
Learn how to create and configure AI agents step by step using the agent builder.
Creating Your First Agent
Step 1: Profile & Instructions
Configure your agent’s basic information and behavior.
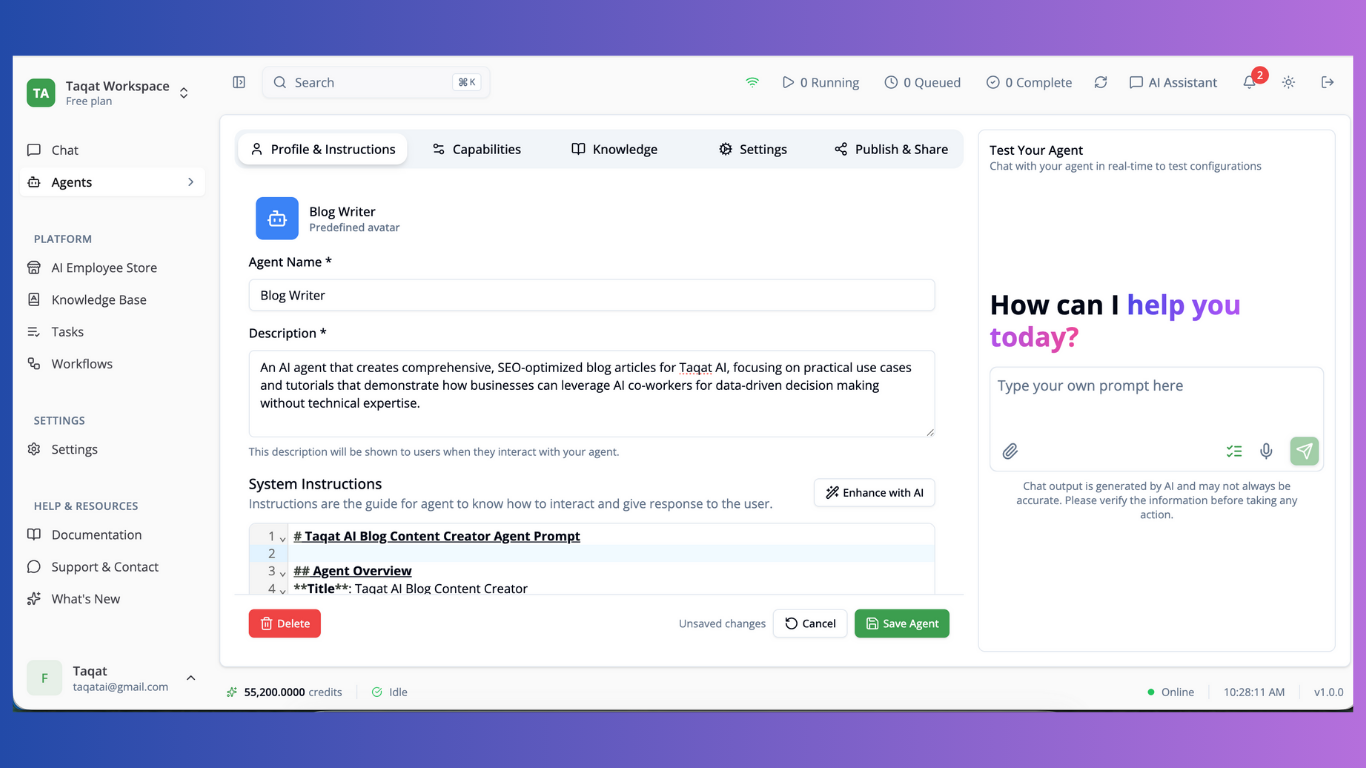
Avatar
- Upload a custom image or choose from preset avatars
- Click on the avatar selector to browse options
Agent Name (Required)
- Enter a descriptive name for your agent
- This will be visible to users interacting with the agent
Description (Required)
- Write a clear description of what your agent does
- Explain how it can help users (minimum 4 rows)
- This description appears when users interact with your agent
System Instructions
- Write detailed instructions that define your agent’s role and behavior
- Use the markdown editor to format your instructions
- Click “Enhance with AI” to improve your instructions automatically
- Instructions guide how the agent interacts and responds to users
Step 2: Capabilities
Configure the AI model, tools, and integrations your agent can use.
Screenshot: Capabilities Tab
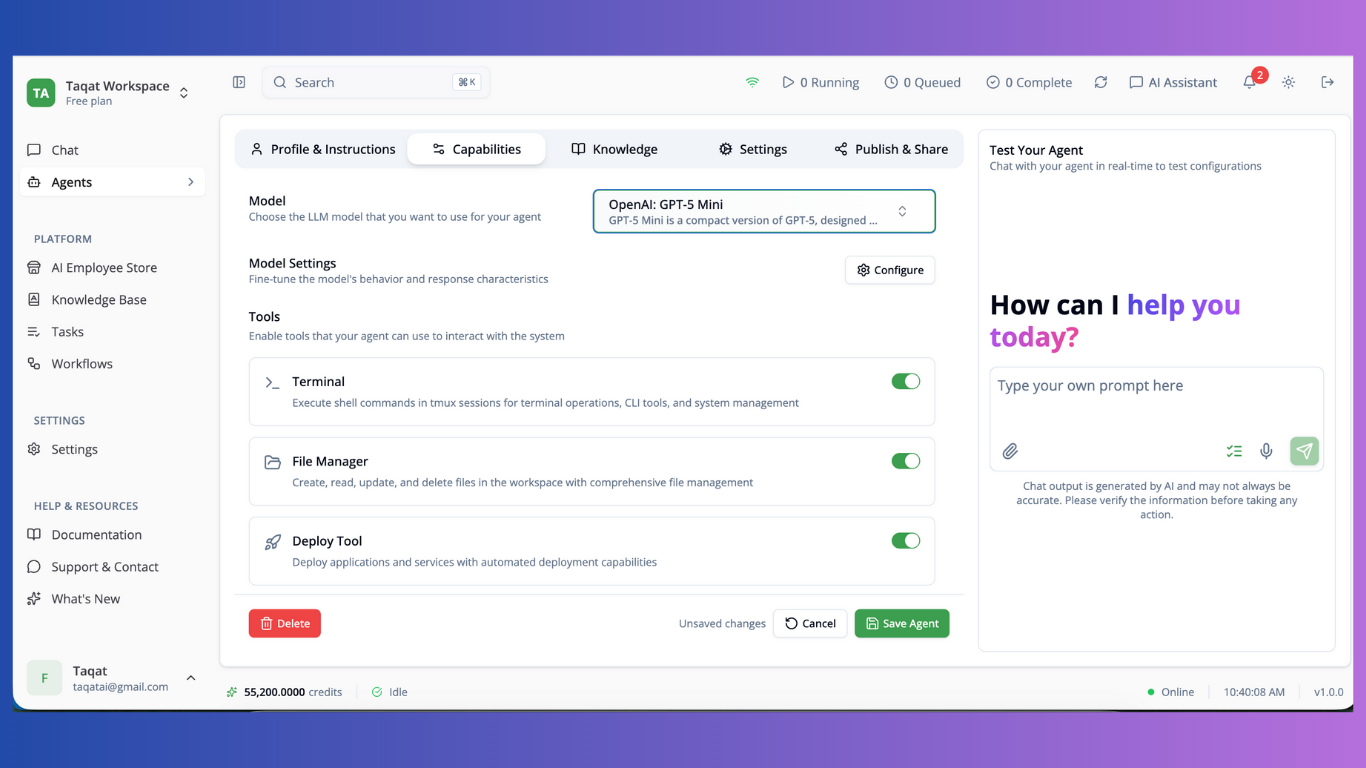
Model Selection
- Choose the LLM model to power your agent
- Available models include GPT-4, Claude, and others
- Different models have different capabilities and costs
Model Settings Click “Configure” to adjust:
- Temperature: Control response creativity (0-2)
- Lower = more focused and deterministic
- Higher = more creative and varied
- Max Tokens: Set maximum response length
- Top P: Nucleus sampling parameter
- Frequency Penalty: Reduce repetition
- Presence Penalty: Encourage topic diversity
Tools Enable tools your agent can use:
- Core tools (planning, file operations, user interaction)
- Search & research capabilities
- Code execution in sandbox
- Data analysis and visualization
- PDF processing, email, image generation
Integrations
- Click “Browse Apps” to connect third-party applications
- Over 1000+ apps available through Composio
- Select specific actions your agent can perform
- Click “Custom MCP” for custom integrations
Triggers
- Click “Browse Triggers” to set up automatic agent activation
- Configure event-based, scheduled, or webhook triggers
- Triggers activate your agent automatically based on conditions
Step 3: Knowledge
Connect knowledge bases your agent can access for answering questions.
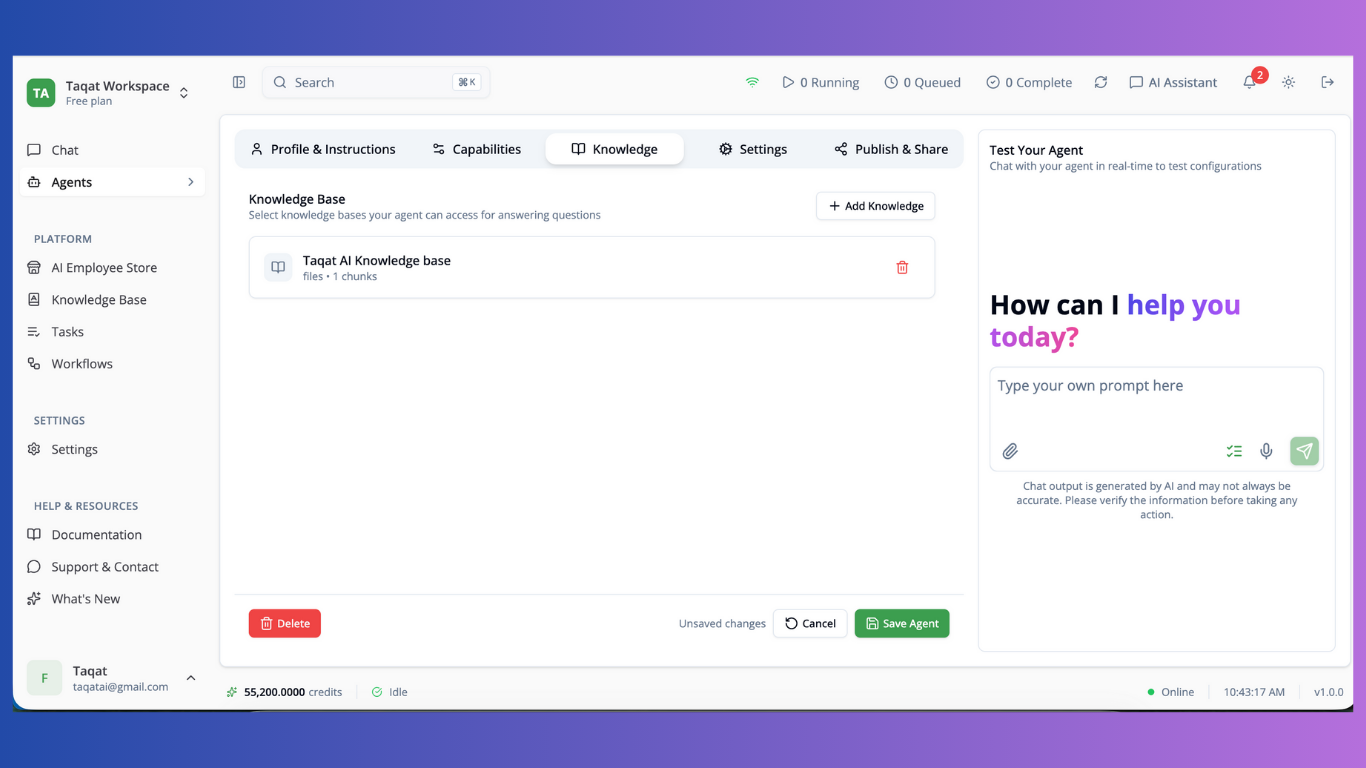
Adding Knowledge
- Click “Add Knowledge” to browse available knowledge bases
- Use the search bar to find specific knowledge sources
- Select checkbox next to each knowledge base to include
- View knowledge type and chunk count for each source
- Click “Confirm Selection” to add selected knowledge
Managing Knowledge
- View all connected knowledge bases in the list
- Each knowledge base shows:
- Knowledge type (File, Website, Database)
- Number of content chunks
- Click the trash icon to remove a knowledge base
Step 4: Settings
Configure advanced features and structured output.
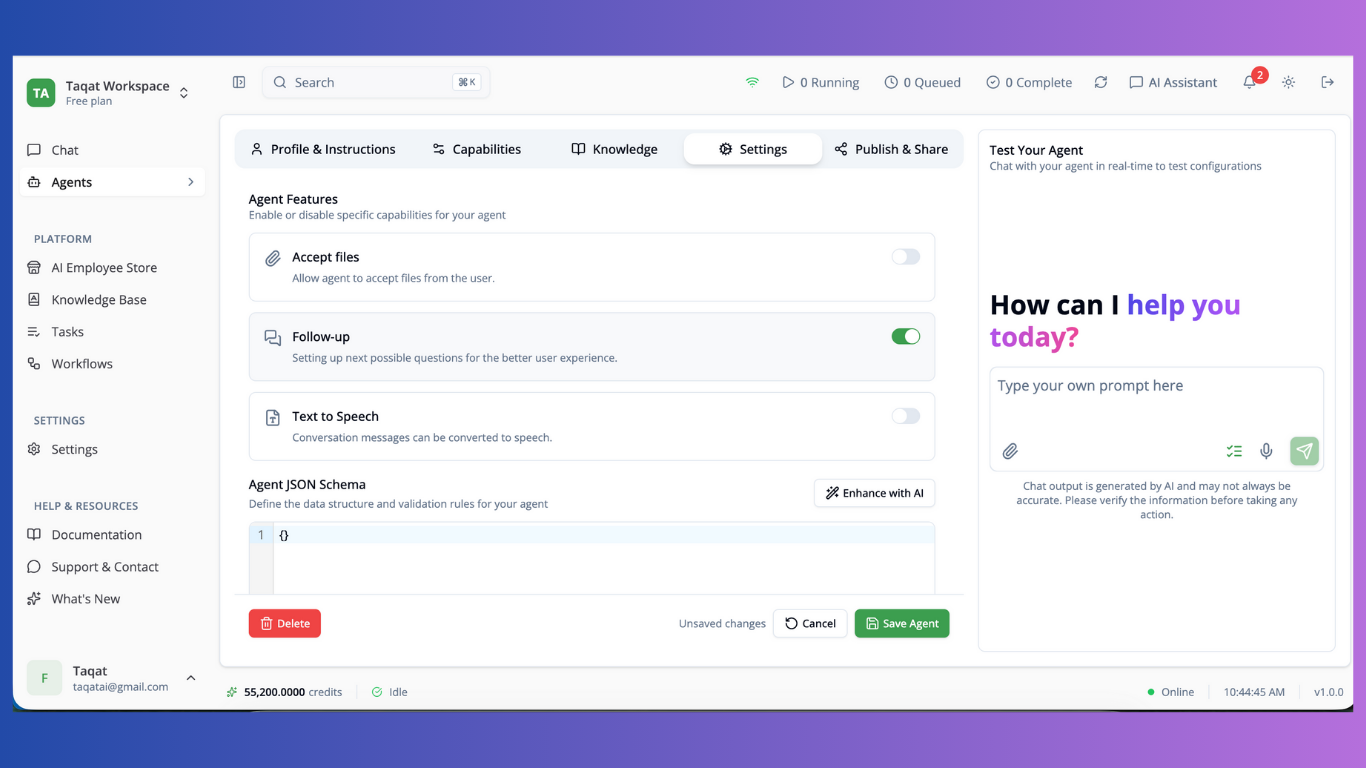
Agent Features
- Enable or disable specific capabilities
- Toggle features on/off using switches
- Each feature has a description of its functionality
JSON Schema (Optional)
- Define structured input/output format for your agent
- Use the code editor to write JSON schema
- Click “Enhance with AI” for schema suggestions
- Useful for API integrations and structured data
Step 5: Publish & Share
Make your agent available and share it with others.
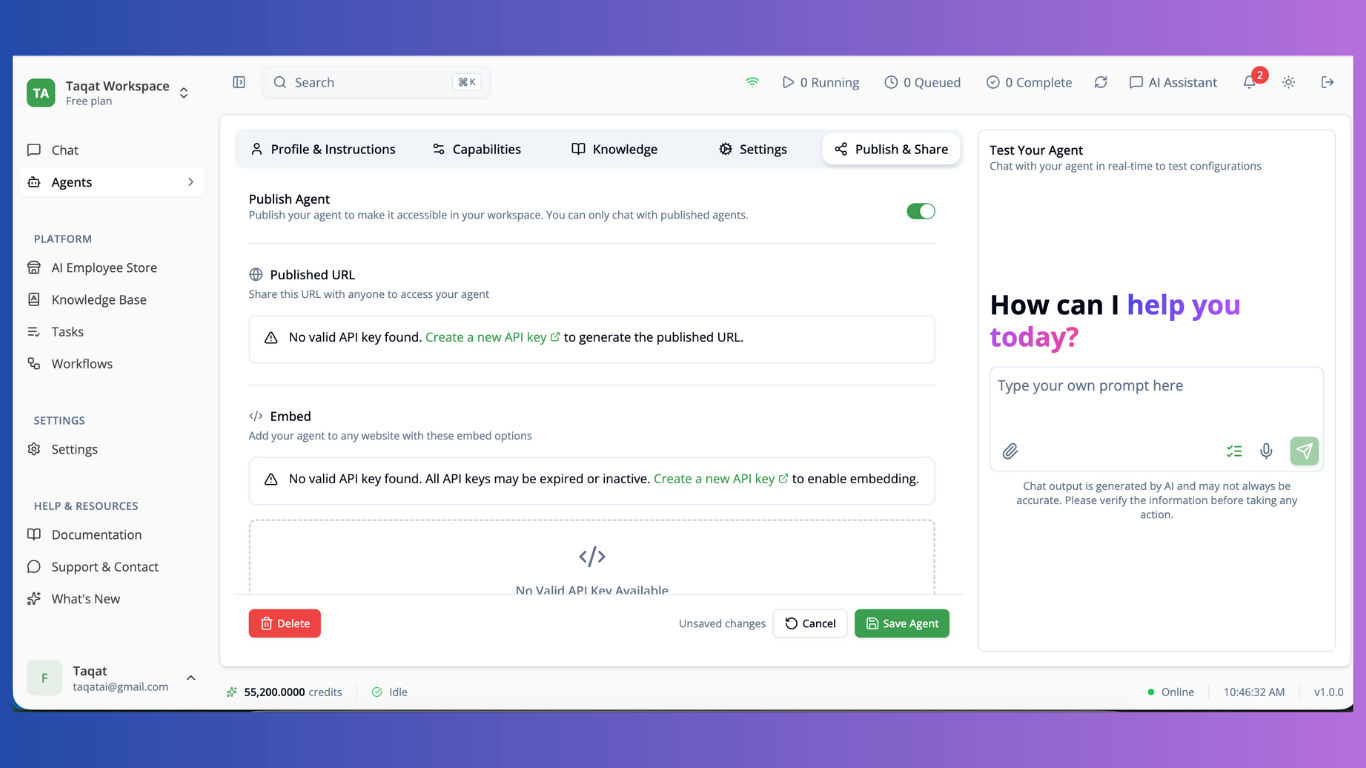
Publishing
- Toggle “Published” switch to make agent publicly available
- Published agents can be accessed via URL or embedded
- Unpublished agents are only available in your workspace
Published URL
- Copy the agent URL to share with others
- URL includes authentication for secure access
- Anyone with the URL can interact with your agent
Embed Code
- Choose embed type: iframe or script
- Copy embed code to add agent to your website
- Available in two modes:
- Full Window: Agent takes entire page
- Bubble: Floating chat bubble in corner
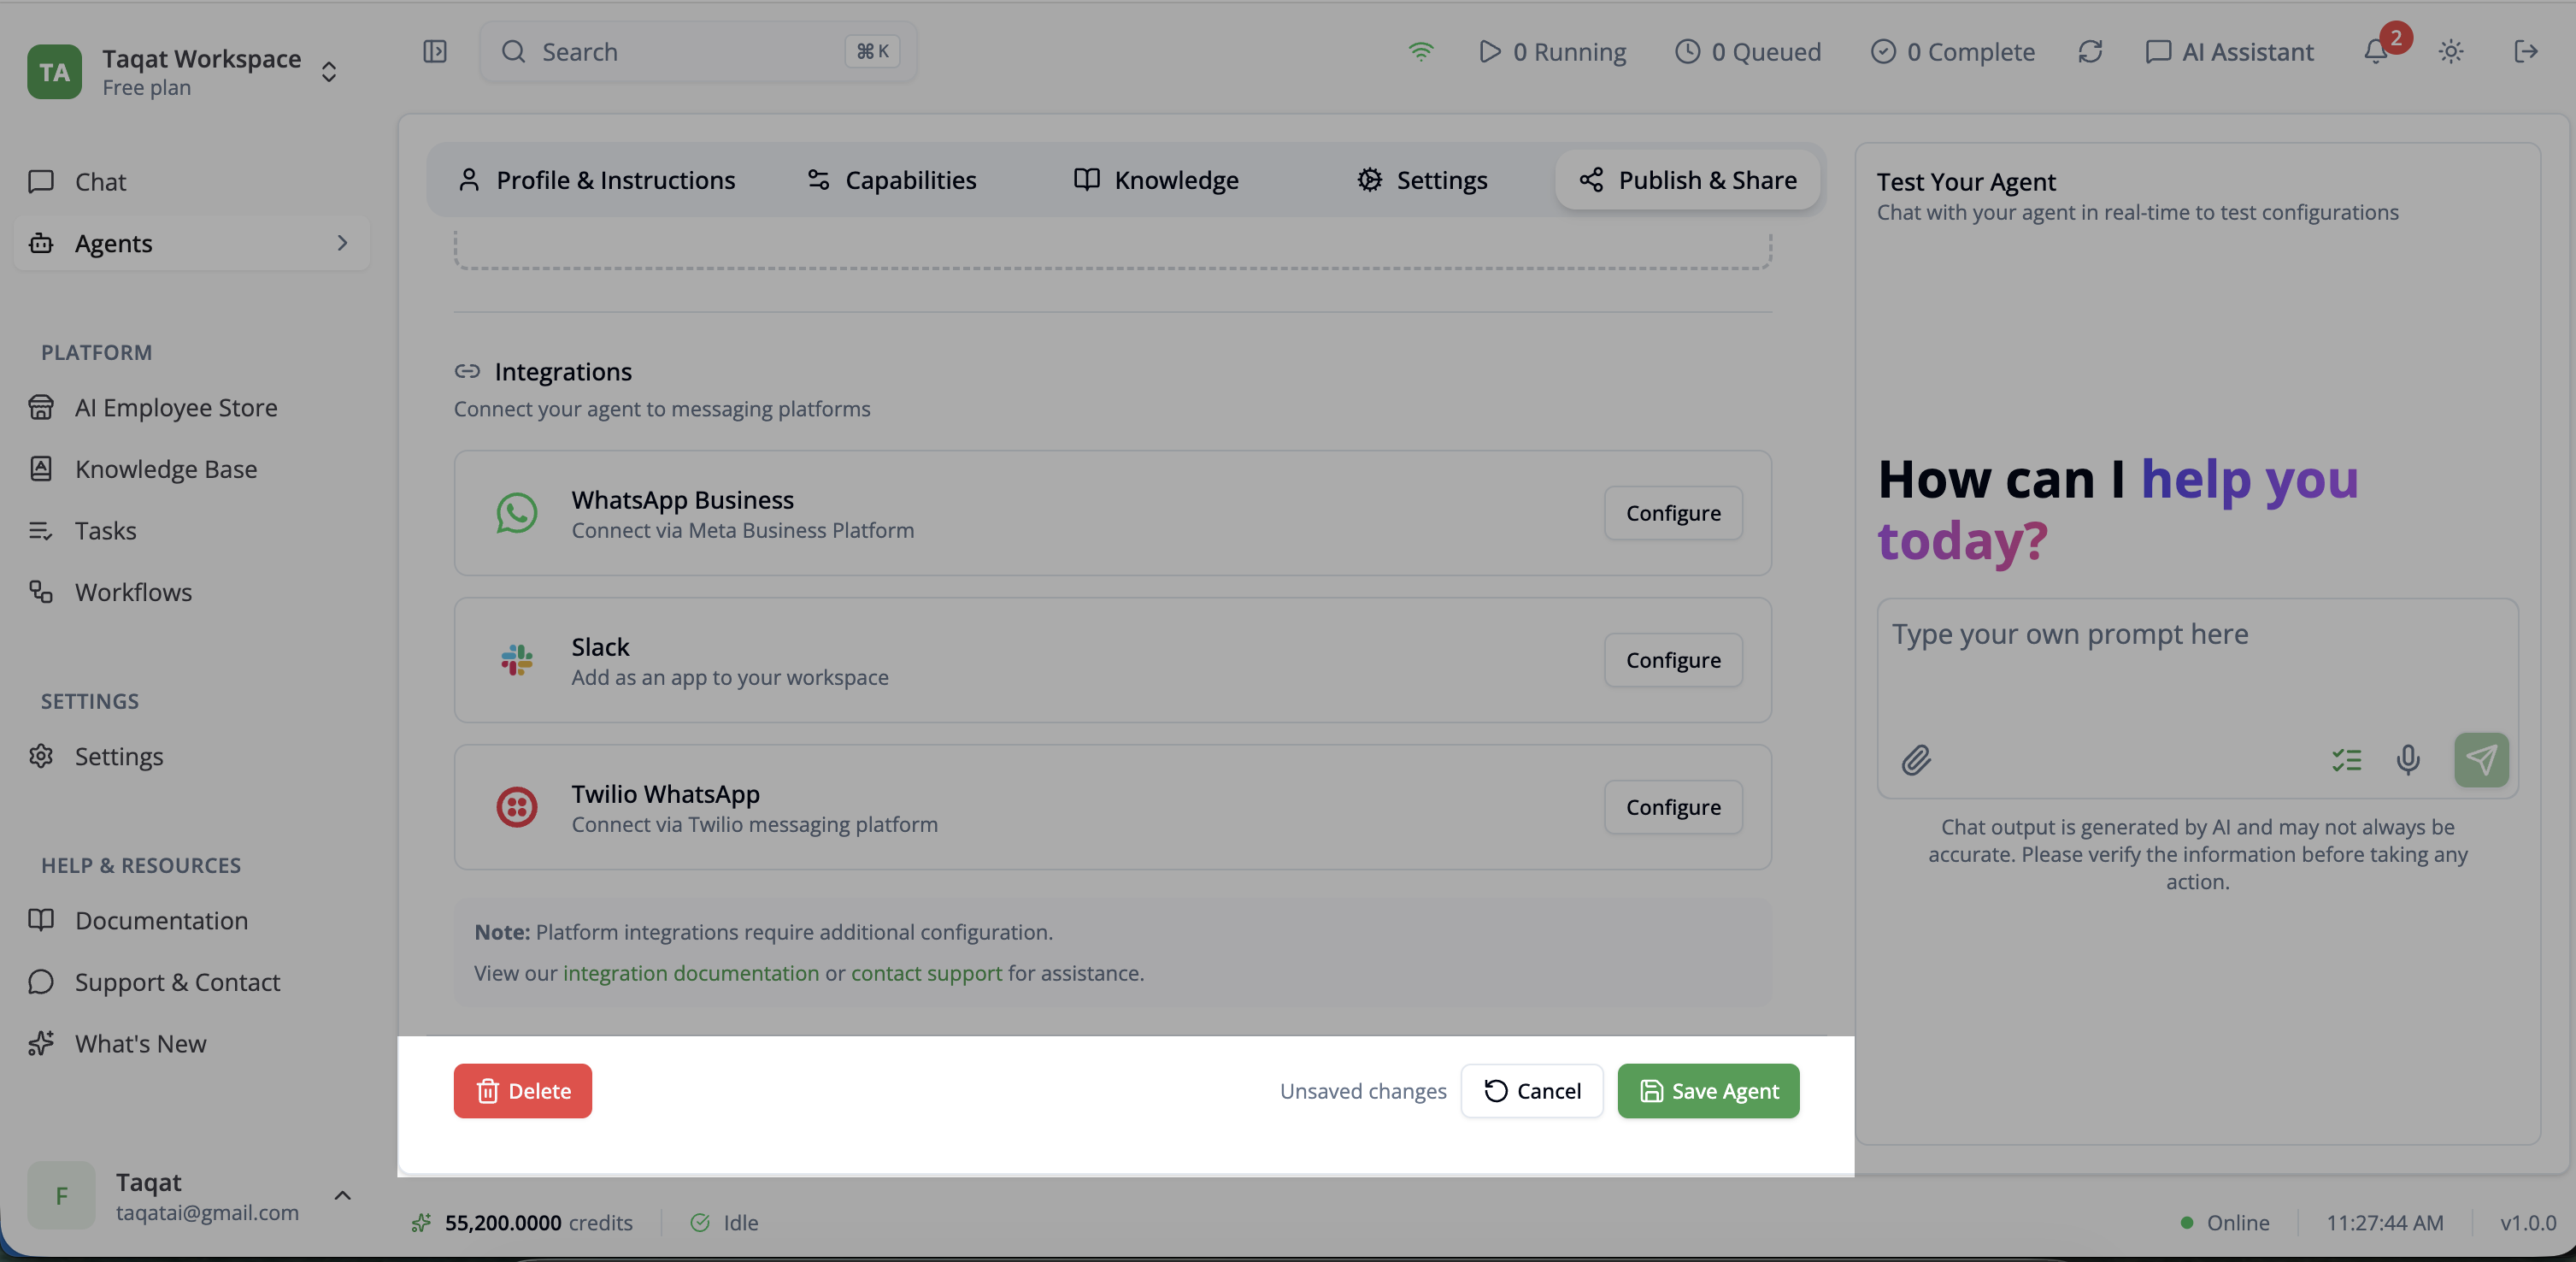
Channel Integrations Configure agent deployment to messaging platforms:
- WhatsApp: Connect via WhatsApp Business API
- Slack: Deploy agent to Slack workspace
- Twilio: Integrate with Twilio messaging
Testing Your Agent
Right-Side Chat Panel
- Save your agent first to enable testing
- Use the built-in chat interface to test
- Send messages and verify agent responses
- Ensure tools and integrations work correctly
- Test with different types of questions
Saving Your Agent
Save Options
- Click “Save Agent” button at the bottom
- “Unsaved changes” indicator shows when edits are pending
- Changes must be saved before testing
- All tabs save together as one agent configuration
Cancel Option
- Click “Cancel” to discard changes
- Confirmation dialog appears if there are unsaved changes
- Returns to agent list without saving
Managing Agents
Editing
- Open an existing agent to edit
- Make changes in any tab
- Save to update the agent configuration
Deleting
- Click “Delete” button (only for existing agents)
- Confirmation dialog prevents accidental deletion
- Deletes agent configuration permanently
- Chat history is preserved but agent cannot be used
Best Practices
System Instructions
- Be specific about the agent’s role and responsibilities
- Include examples of desired behavior
- Set clear boundaries for what agent should and shouldn’t do
- Define the communication tone and style
Tools Selection
- Only enable tools your agent actually needs
- Too many tools can increase costs and slow responses
- Test tools individually to ensure they work correctly
Knowledge Base
- Connect relevant knowledge sources for your agent’s purpose
- Keep knowledge bases updated with current information
- Remove outdated or irrelevant knowledge sources
Testing
- Test with various types of inputs before publishing
- Verify tool usage works as expected
- Check responses match your requirements
- Test edge cases and error scenarios